
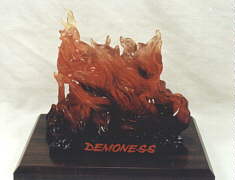
What a killer kit! Demoness sculpted by Steve West of Cellar Cast really shows you what a sculpting powerhouse this guy is. The sweet thing about this particular kit is that it comes with a clear, amber-colored 'flame' base that can be lit up with a little extra work.
 |
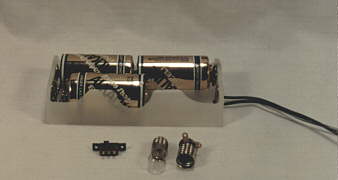 |
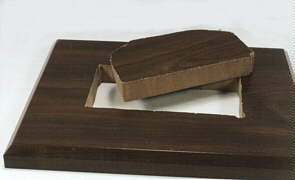
| To start, I went to a trophy shop and purchased a small rectangular plaque for about three dollars. For the batteries, I used a battery clip that holds four C batteries. You can get these at Radio Shack. I also picked up a couple of six volt light bulbs and a small toggle switch. Put the battery clip in the center of the plaque and trace around it with a pen. Drill a hole in one corner of the square you just drew. Then take a coping saw and saw the square out of the center. |
 |
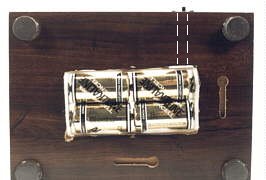 |
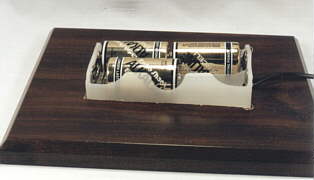
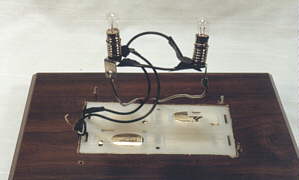
| I had originally intended to have the batteries set slightly above the base as in the first figure but the flame base was too small to conceal them. I would have to hollow the flame base out some more and I didn't want to choke on any resin dust. Therefore, the battery pack now sticks out of the bottom of the base. I used four magnets as foot pads and superglued one on each corner. These raised the base so the battery pack had plenty of room. For the switch, I drilled a good-sized hole through the backside of the base until it met the hole in the center. This hole is represented by the dotted lines. You will use this hole to feed the wires through. |
 |
 |
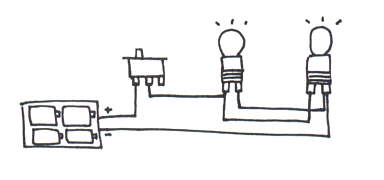
| My funky diagram shows you how to wire this thing up. It doesn't matter which is positive or negative but you do not need to get the wires crossed or you will get a short. The switch has three posts. Be sure to attach one wire to either end post and one to the center post. I suggest wiring this thing up before you install it in the base. This way you can test it to make sure it works. After testing, take a solder gun and solder each contact point. You must unwire the switch, feed the two wires through the base and then re-connect them to the switch. Use two small screws to attach the switch to the base. For extra safety, I wrapped the solder connections with electrical tape. I took two pieces of solder and superglued them to the lights and the base. This way, the lights can be positioned inside the flame base. |
 |
 |
| I inserted four pieces of coathanger wire into the bottom of the flame base. I then pressed the base into the plaque so as to leave indentions made by the wire. Using these indentions as guides, I drilled holes in the plaque so the wires from the flame base could be inserted. The flames are not permanently attached to the wooden base so the lights can be changed if they burn out. |